KIDS SUSPENDERS DIY

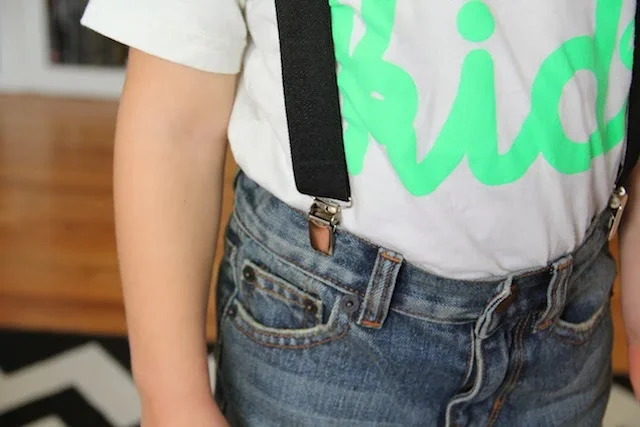
A few weeks ago I posted a picture on Instagram of Elliott wearing suspenders and I had a few requests for a suspenders DIY. So, here you go! They were easier than I thought they would be to make. I actually made two pairs in the time I thought it would take to make one. It was pretty easy to find the supplies too. They sell the fasteners and elastic in pretty much any craft store. I love them and Elliott loves wearing them! 

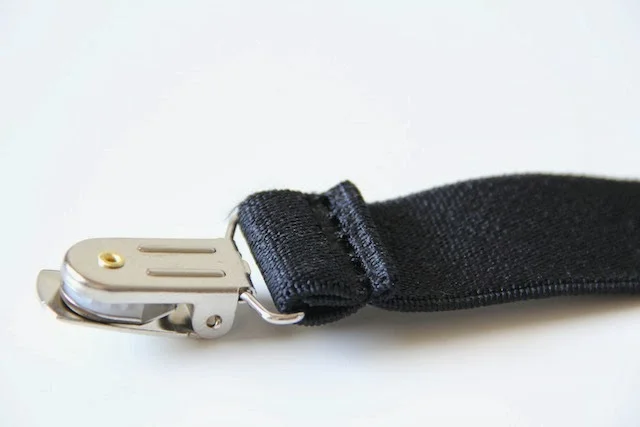
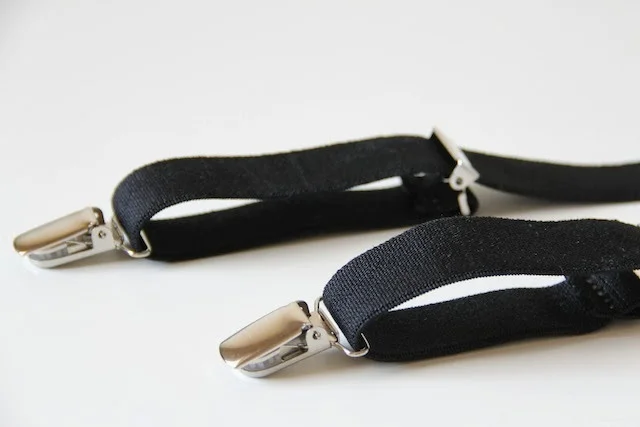
Measure out the length of elastic to about 30 inches. You might want to make them smaller or bigger based on the size and age of your little one. Depending on the type of fasteners you get, you'll want to loop the elastic through and fold it over and sew, sew, sew! You'll want to make sure it's plenty strong. These are for kids after all! 

Cross over the elastic lengths and sew them together in a diamond shape. This won't be in the center of the elastic, but further down and right square in the center of the back. 

This is totally optional, but I wanted to have some suspenders that would grow with Elliott, not just made for his current shortness. So I added some adjusters to make them...adjustable. Again, you could totally skip this step, but in case you don't, again make sure you sew it over and over to ensure strength. And that's it! Not too hard, right? Totally worth the outcome.

Despite Elliott's expressions, he really does love his suspenders. He thinks he looks so fancy.

MONOGRAM ART DIY

This little piece of art is so easy to make. It takes no skill set, whatsoever! I wanted to make something mostly black and white, with a tiny pop of color for Elliott's room. I love the way it looks next to the horse! And of course, since it's an "E" Elliott couldn't be more thrilled about it. To make your own, check out the full tutorial over here on Momtastic

BIKE BELL MAKEOVER DIY

Elliott has been asking for a bell for his scooter for forever. And frankly, I was sick of hearing about it. Ha! I found this really ugly "I love my bike" bell with the plan of painting over the ugly. Turns out, the ugly part was a sticker! So after removing it and cleaning it, I decided to spruce up the plain white with some dots. I love how it turned out! More importantly Elliott loves it. Even though the dots didn't go anywhere after I rubbed them, I still added a little bit of sealant just to be sure. I think it would be the perfect bell to paint like a donut too. Wouldn't that be cute? You can find a similar bell here. But trust me, the one I bought was even uglier. 

WE LOVE: CLASSIC BOOKS + NEW COVERS

A few months ago a friend of mine told me Target had some great classic books with all gorgeous new covers. And in the dollar bins no less! We headed straight for the nearest Target to get some and we have loved them ever since. I especially love the clever and colorful covers. We have been reading a chapter or so out of one of the books each night for the last little while. Elliott loves them! Preston's great talent for doing voices while he reads certainly has something to do with that. Elliott has especially been loving Pinocchio. Which, for anyone who doesn't know, is quite a bit darker than the Disney version. We love it! Elliott has even requested we print out pages from the book for him to color. As he colors, he tries to do the voices and tell the story. It's so sweet. If you can, get to your nearest Target and buy these. They are a treat for the whole family and are sure to stick around for years to come.

ALPHABET FUNNEL CAKES DIY

When we went to the fair last week, we decided against the $7 funnel cakes. $7! Sheesh. Instead, I thought we could make our own at home and make them even more fun! What's more fun than learning while snacking? These funnel cakes are crunchy goodness on the outside and fluffy heaven on the inside. This is more of a recipe than a DIY, but you know how it is. Here's what you'll need:

1 Egg
2 C Milk
1 Tsp Vanilla
2 C Flour
1 Tbs Baking soda
1 Tbs Salt
1 Tbs Sugar
1/2 Stick of Butter
Powdered Sugar (to sprinkle)

First mix the wet ingredients in a mixer, then slowly add the dry ingredients till you have a nice smooth batter. Next, melt your butter and fold that into the batter. It wouldn't be worth eating if it didn't have butter, right? While your butter is melting, now is a good time to heat up your oil. I used coconut oil (yum!) but you can use whatever kind you like. Once your butter is folded in, pour your batter into a squeeze bottle. I know these are called funnel cakes, but ours our squeeze bottle cakes. Once your oil is nice and hot, start squeezing out your letters! Let them cook for a minute on each side (until golden brown) and set them out to dry. Once their all done, sprinkle on some powdered sugar and enjoy! It's a lot of fun and really doesn't take very long at all. Elliott loved recognizing and then promptly eating the letters. These would be really fun to have at a circus or ABC themed birthday party too!