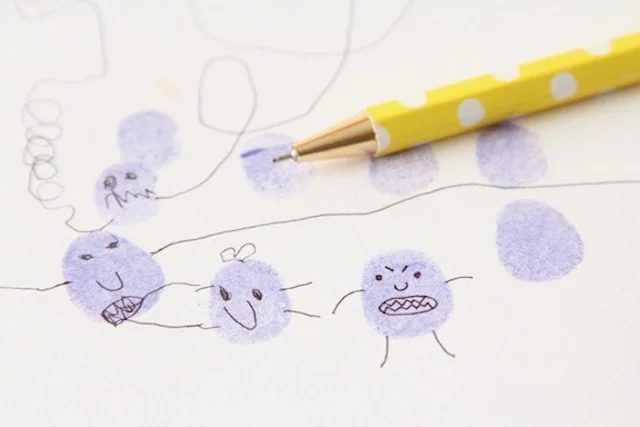
FINGER PRINT ART

IMG_5210.JPG
IMG_5179.JPG

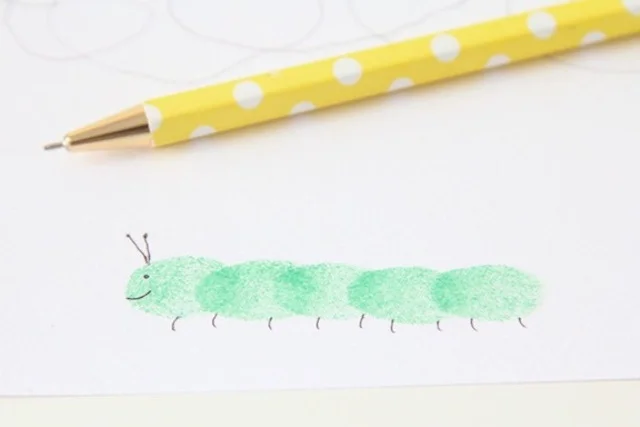
Elliott got some new ink pads for Christmas so we put them to good use and made some finger print art! I have to admit, it was pretty fun seeing what we came up with. This is a great afternoon activity you can do with the kids and I promise, you will have fun too! I highly suggest using washable ink pads if at all possible. I got mine at Michaels and they not only are washable, but the colors are nice and bright. You can see more details over here on Momtastic

IMG_5206.JPG

NEW YEAR'S PARTY DRINKS + HATS

IMG_3814.jpg
IMG_4016.JPG
IMG_3805.JPG

I hope you all had a very merry Christmas! Now on to the new year. These are so much fun! Not to mention super easy to make. We plan on using them for New Year's day for a little breakfast or brunch. I am still coming up with my own resolutions, but I have a few I want to force on Elliott. Kind of defeats the purpose though I guess. If you want to make some for your family, you can see the resolution cups tutorial over here, and the party hats over here! Happy partying and happy new year my friends!

MAKE YOUR CHRISTMAS

MAKE CHRISTMAS.png

There are just a few days left until Christmas! I can't believe it. In case you are in need of some fun DIY gifts for the littles, here is a little roundup of our favorites from AWP this year! Forget the lines and crowds at the mall. Get out your supplies and make some gifts the littles will really love! The best part about these gifts? No batteries! Ok so maybe that's not the best part, but it's a definite bonus. Happy crafting and merry Christmas!

Hobby horse / Lumps of coal surprise balls / Head tags / Shapelys memory game / Slingshot + felt ball ammo /

SLINGSHOT WITH FELT BALL AMMO

IMG_4939.JPG
IMG_4944.JPG
IMG_4940.JPG

When I was a kid, I was a total tomboy. Like really. One year I got a slingshot for Christmas and I absolutely loved it! Mine came with these little BBs that I shot at trees and targets and maybe my little brother. Maybe. To avoid shot out eyes and lawsuits , I thought of my good friend Aubry who sells these colorful and soft (keyword) felt balls. The perfect ammunition! If you don't feel like creating your own template, you can borrow ours! You can download it here. This project is a little more hands on than most, but I promise the outcome is so much fun it's totally worth it. I can't wait for Elliott to see this Christmas morning!

IMG_4826.JPG

If you have some scrap hardwood lying around, great! If not, your local lumber yard should have some that will work nicely. Cut and trace the template onto the wood.

IMG_4830.JPG

Grab your saw and go to work! We used some clamps to keep it in place, but that's not totally necessary.

IMG_4847.JPG

Once you are done sawing, it's time to sand it down. We don't want little hands getting any splinters! 

IMG_4854.JPG

Next, we need to cut some slits for the rubber bands to go in. Just a handsaw will work great.

IMG_4929.JPG

For the pouch, I used some scrap suede I had and it worked great. Cut and trace the template onto the leather then cut. Don't forget the holes! 

IMG_4933.JPG

This next step is totally optional. I wanted to add a pop of color so I painted the sides with some paint. 

IMG_4938.JPG

Now tie the rubber bands to the pouch and slide the bands into the slits. You're done! Not too bad, right?

IMG_4958.JPG

HOW TO MAKE PERFECT PAPER SNOWFLAKES

IMG_4910.JPG
IMG_4908.JPG
IMG_4927.JPG

Is there really such a thing as a perfect snowflake? If there is, we are going to show you how! I literally just learned the art of paper snowflake making. I have always assumed I couldn't do it because, well my mind doesn't work that way sometimes. But Preston is a snowflake genius, so he showed me how and now I'm kind of addicted. So if you are wondering how on earth people make such fun paper snowflakes, now you can join in on the fun! 

IMG_4870.JPG

First, fold your piece of paper so that it makes a square. Take one corner and match it up with the opposite side.

IMG_4873.JPG
IMG_4877.JPG
IMG_4879.JPG

Then keep folding it the same way over and over. The more times you fold it in half, the more intricate your designs will be!

IMG_4891.JPG

Now before you start cutting out your fun shapes, you will want to trim the top so it is rounded. Or if you want a square snowflake, cut it straight across!

IMG_4902.JPG

Now you can cut wherever you like and however you like! Cut out triangles, semi-circles, anything your heart desires.

IMG_4905.JPG

Once you have sufficiently cut up your paper, unfold it to reveal your gorgeous new one of a kind snowflake! Told you it was easy. 

IMG_4916.JPG