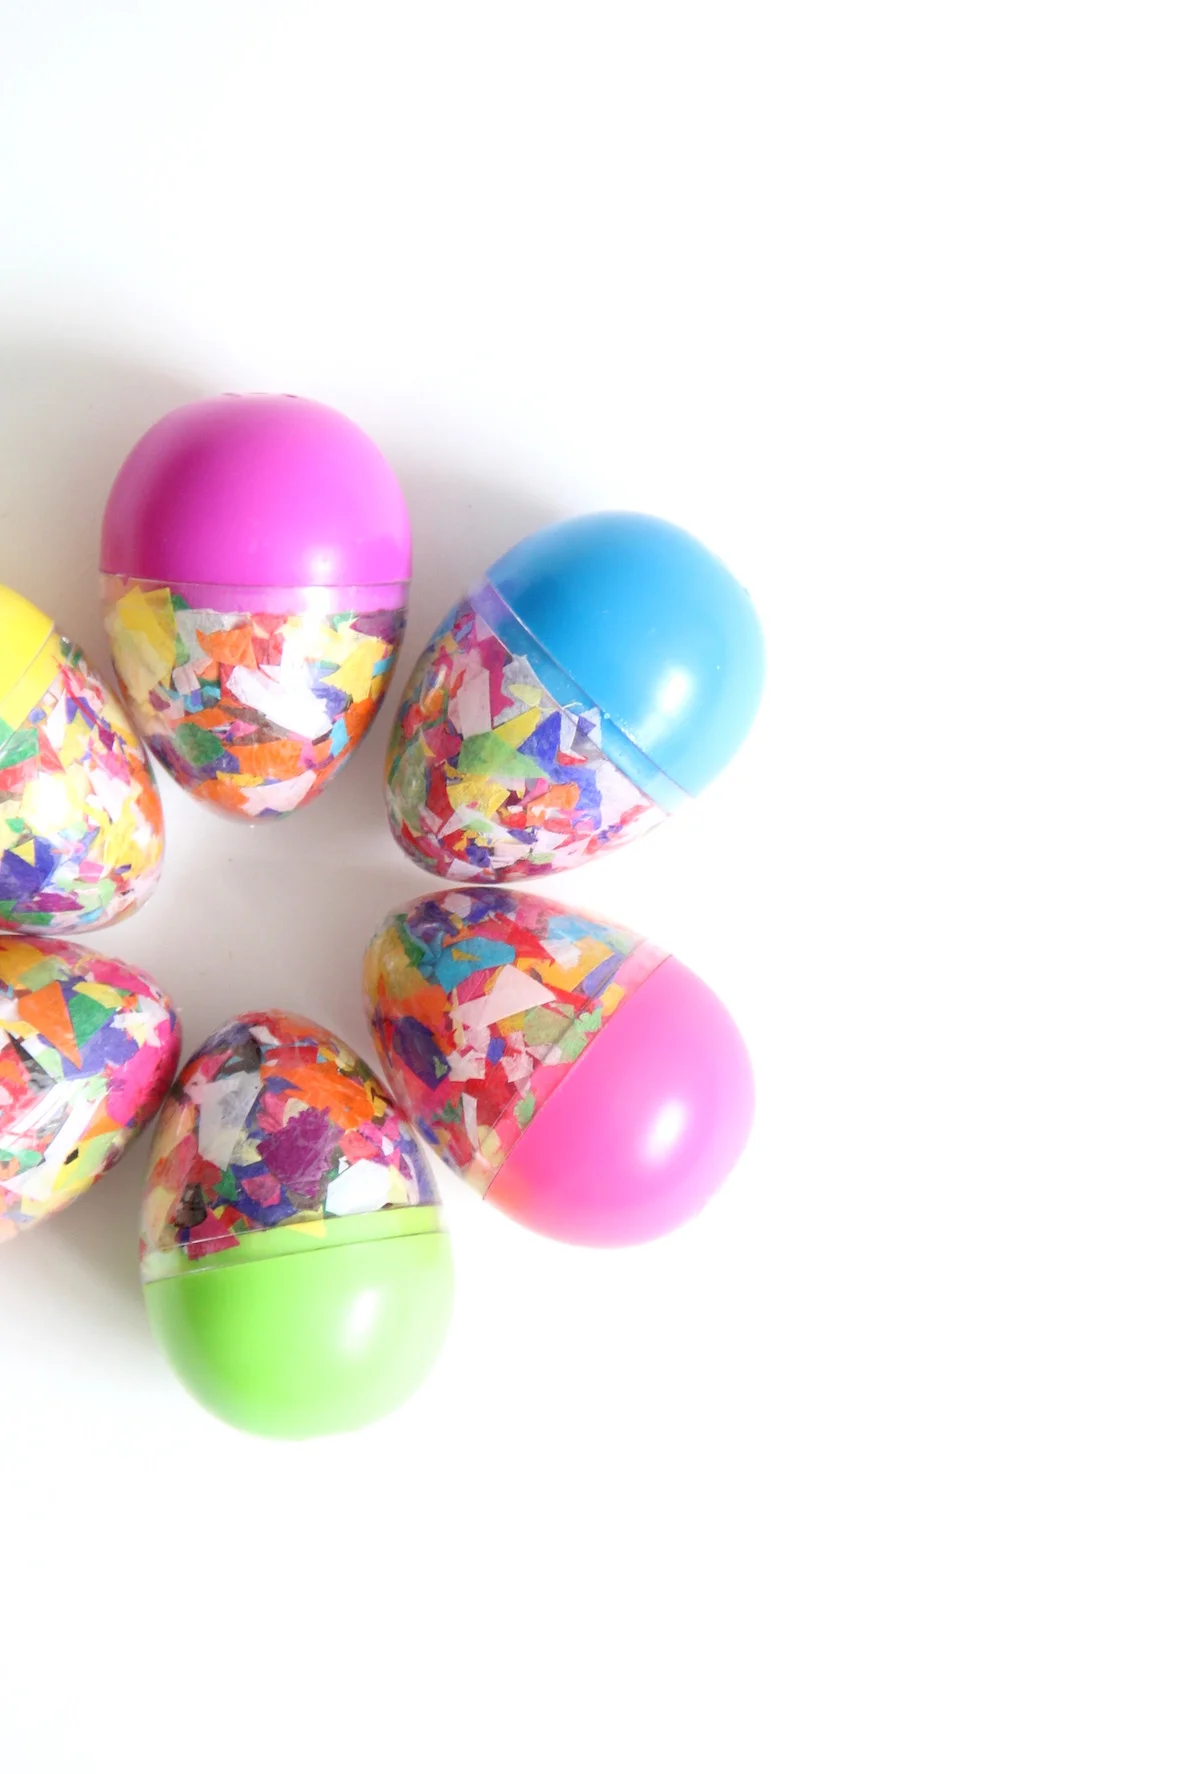
DIY CONFETTI EGGS

DIY confetti eggs! | And We Play
DIY Confetti Eggs | And We Play

How fun and festive are these eggs?! I searched high and low for eggs with clear plastic tops to try out this idea and I am so glad I found them. They look like they are filled with confetti, but really there is plenty of room for candy or small toys. That's what I call a win, win! These will be so much fun to use on Easter both in baskets and for an egg hunt!

DIY Confetti Eggs | And We Play

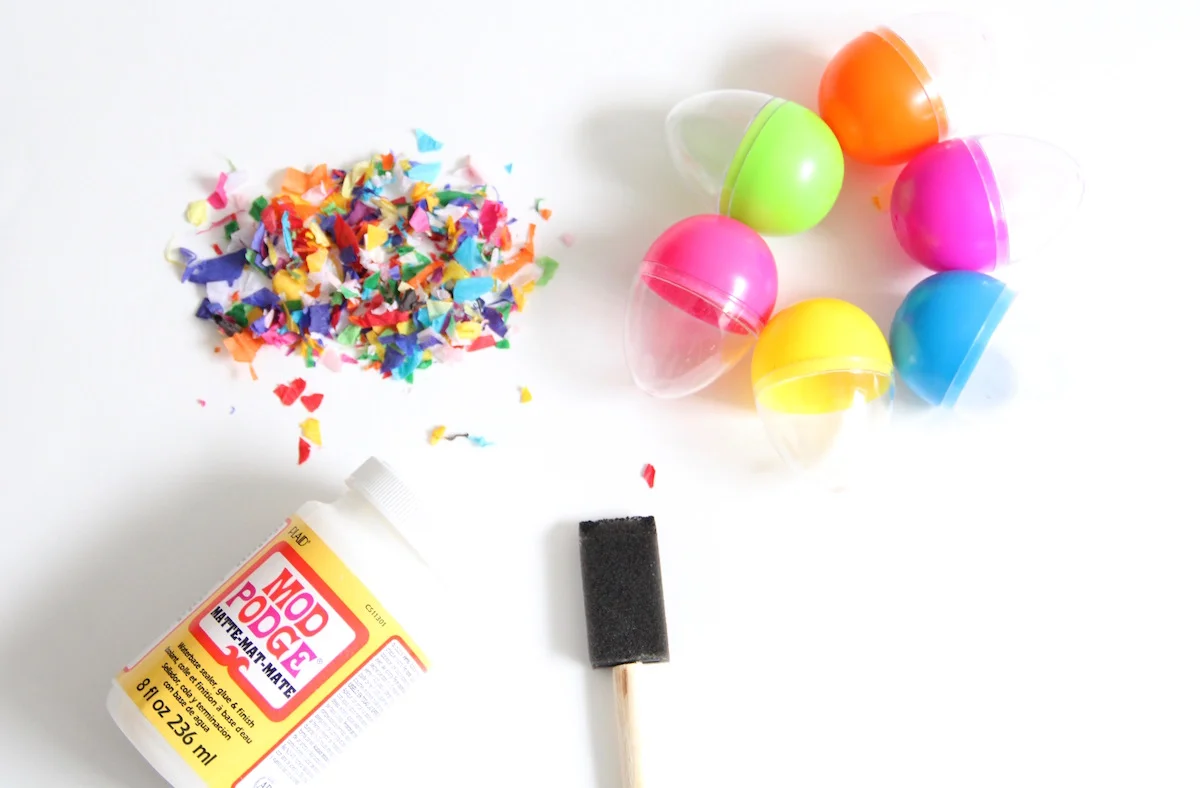
These are SUPER easy to make. All you need is some confetti, eggs with clear tops, mod podge and a paint brush of some kind. You can probably guess the creative process here, but just in case I'll tell you anyway. Dip your brush in the mod podge and brush on a coat on the inside of the clear top from the egg. Then sprinkle in some confetti! Use your fingers to push the confetti in there nice and tight to create the look you want and let it dry. So easy and fun. This is totally a project that could be done binge watching some Netflix. Once they are dry they are ready to be filled with Easter goodness! 

DIY Confetti Eggs | And We Play

DIY EASTER ERASERS

DIY Easter erasers | And We Play
DIY Easter erasers for kids - the perfect basket filler!

I was walking the isles of a store I had no need to be in and I found these adorable mini cookie cutters for Easter. So of course I instantly started thinking up ways to use them and this was my favorite idea. Easter erasers! They are the perfect thing to fill those plastic eggs for your kids' baskets, or better yet, make them with the kids so they can have some fun too!

DIY Easter erasers for kids | And We Play

To make them you'll need eraser clay, I love this brand. Then just treat it like regular clay (knead it, roll it out and cut it) For the color-blocked ones, you will want to make sure they are about the same thickness and join them together with two flat edges. Also, before you cut, flip them over and get rid of the crease that keeps them separate by gently pushing the clay colors together. This will help them become one without ruining the look on the front! For the marbled ones, just take a little bit of that color and a little of this color and lightly mix them together. Mix them too much and the marble effect won't work. Then use the cutters to cut out the shapes! I cut mine directly onto a cookie sheet so I don't have to move them before baking. Follow the instructions that come with your clay and you'll be just fine!

DIY Easter erasers | And We Play

After baking (again, follow those instructions!) you should be good to go! Stick them in eggs, baskets, hand them out at school, it's all good and highly encouraged. Have fun!

DIY Easter erasers - great basket fillers!
DIY Easter erasers | And We Play
Make your own Easter erasers with this easy tutorial | And We Play

ST. PATRICK'S DAY TATTOOS

Printable St. Patrick's Day temporary tattoos! (click through for download)
Printable St. Patrick's Day temporary tattoos (click through for download!)

Just in time for St. Patty's day! Some tattoos of course! If green isn't your color, or if you just can't get enough green, these tattoos are for you. The shamrocks are the perfect subtle bit of green to avoid getting pinched, and the rainbows...well, who doesn't love rainbows? You can download them right here and print them off onto temporary tattoo paper on a photo paper setting to get the best quality. Super easy to make and a lot of fun to wear! 

Printable St. Patrick's Day temporary tattoos (click through for download!)

I'M BANANAS FOR YOU VALENTINE PRINTABLE + PIN

Bananas for you valentine printable + DIY pin! | And We Play
Bananas for you valentine printable + DIY banana pin! | And We Play

What is valentine's day if not an excuse to use corny puns? I wanted to make some valentines that both boys and girls would love to hand out and receive. I mean, who wouldn't want their own banana pin? It's really simple to make and the pins can be made in bulk! To get started, you can download the bananas right here, and the valentine cards right here. To make them, all you need is some printable shrink film, a printer, scissors and an oven. Print the bananas onto the shrink film paper and be sure to follow the directions closely and you should get some cute little bananas in the end! You'll notice that the bananas turned out a lot darker once they are shrunk, that's normal! Also, the banana design is about 50%+ larger than they end up being after you bake them. So to make a enough for a whole class, you'll likely need to use several sheets of the shrink film. But it is SO worth it! To make the bananas into pins, just grab some small pin backs and attach them to the backs with strong adhesive (I used super glue) Then pin them onto the valentine cards and they are ready to gift! Easy and fun, right?! I have to warn you, the shrink film is addictive. Happy shrinking!

Bananas for you valentine printable + DIY banana pin! | And We Play

THREE EASY PRINTABLE VALENTINES

Easy valentines for kids | And We Play

I love a great DIY valentine as much as the next person, but sometimes you need something that looks great and fun, but is also fast and easy. These three valentines are just the thing! Another bonus, they are a candy free option the kids will love. You can get all three printables right here as well as more details on how to make your own! Check them out and have fun spreading the love!

Easy valentines for kids | And We Play