COLORING CHORE CHART

IMG_5150.JPG
IMG_5141.JPG

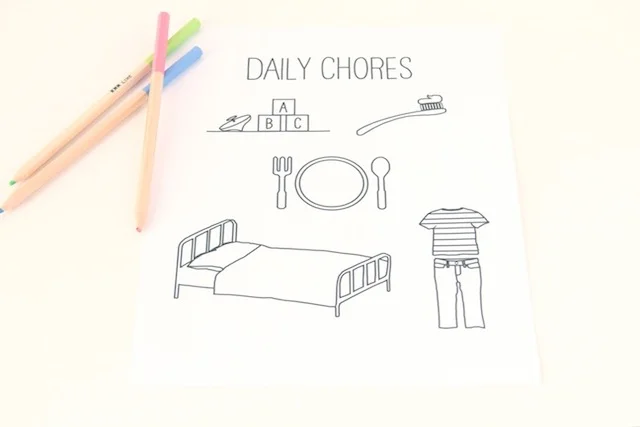
With the new year, we thought it was the perfect time to help Elliott out with some of his resolutions. This chore chart has been a huge help so far! It's more fun for him to clean up his toys or brush his teeth when he knows he gets to color the object to cross it off his list. And if they aren't feeling like coloring, a simple X or a scribble will suffice. You can download this chore chart here, or make your own! Either way you'll be happy about their new habits and they will have fun while getting stuff done! 

DECODER VALENTINES

IMG_5415.JPG
IMG_5430.JPG
IMG_5409.JPG

Ok, these are fun. Elliott has been scribbling "messages" down and then scribbling over them with red since I showed him these. And I have to admit, I am a little addicted too. They would be really fun to make for a small group of friends with little secret messages just for them. They would be a lot of fun for a party invitation too! The tricky part about these is you have to print them out twice. First print out the faint message you want to keep secret, then put that same piece of paper back into the printer and print out the red scribbles on top of the other design. It's a little tricky to remember which way to put the paper back in at first, but once you get the hang of it, it's super easy! You can design your own, or use the two I made. You can download "I've got my eye on you" here, and the hearts here. You can download the red scribbles here. Hopefully your little ones and their valentines have as much fun with them as we have! Now, to make those decoders.

IMG_5395.JPG

With some cardboard (mine was from a cracker box) punch the center circle out first. This will be the part you use to reveal the messages.

IMG_5396.JPG

Next, punch the squares around the circles. The reason I did it this way is because it is near impossible to punch a hole centered unless you do the circle first, then the square after. 

IMG_5401.JPG

Grab your choice of duct tape and cover each side. I used white and needed to do a couple of layers of tape to cover the design on the box. Then grab your exacto knife and trim the circles out as well as the edges off. 

IMG_5404.JPG

Next, cut a piece of red cellophane small enough to cover the hole, but not so big it pokes out the sides. Use some glue to attach the cellophane over the hole. I got my cellophane from a party store for a few bucks for a large roll. Then glue the two sides together and you're done! Feel free to decorate them with little hearts or just leave them plain. Totally your call. 

IMG_5423.JPG
IMG_5407.JPG

Happy decoding!

LACING CARDS

IMG_5297.JPG
IMG_5284.JPG

Lacing cards are one of those classic toys that every kid needs at one point in their childhood. They are awesome for practicing fine motor skills which we all know can be a tricky and frustrating thing for little ones to learn. These lacing cards are fun and really easy to make. You can make a dozen of them in minutes! Decorate them however you like and most importantly, have fun! Check out the full tutorial over here on Momtastic

IMG_5295.JPG

SLINGSHOT TARGET

IMG_5365.JPG
IMG_5354.JPG
IMG_5334.jpg

After playing with Elliott's new slingshot over Christmas break, we realized we needed something to shoot. After setting up toys on the end of the couch (which was fun, don't get me wrong) I thought we should make a little game of it with a target. So of course I decided to make it available to you as well! Even if you haven't made a slingshot yet (what are you waiting for?) this target would be great for shooting rubber bands, throwing paper airplanes or anything else you can think of. If you'd like to play, you can download the target here. If you head to your local print shop, they can print it out as if it were a blue print for about $3! Pretty awesome, right? We're having a blast with ours. Elliott doesn't quite have the hang of it yet, but we're getting there. Have fun and happy shooting!

IMG_5301.jpg