CEMENT SANDCASTLES

Cement sandcastle DIY

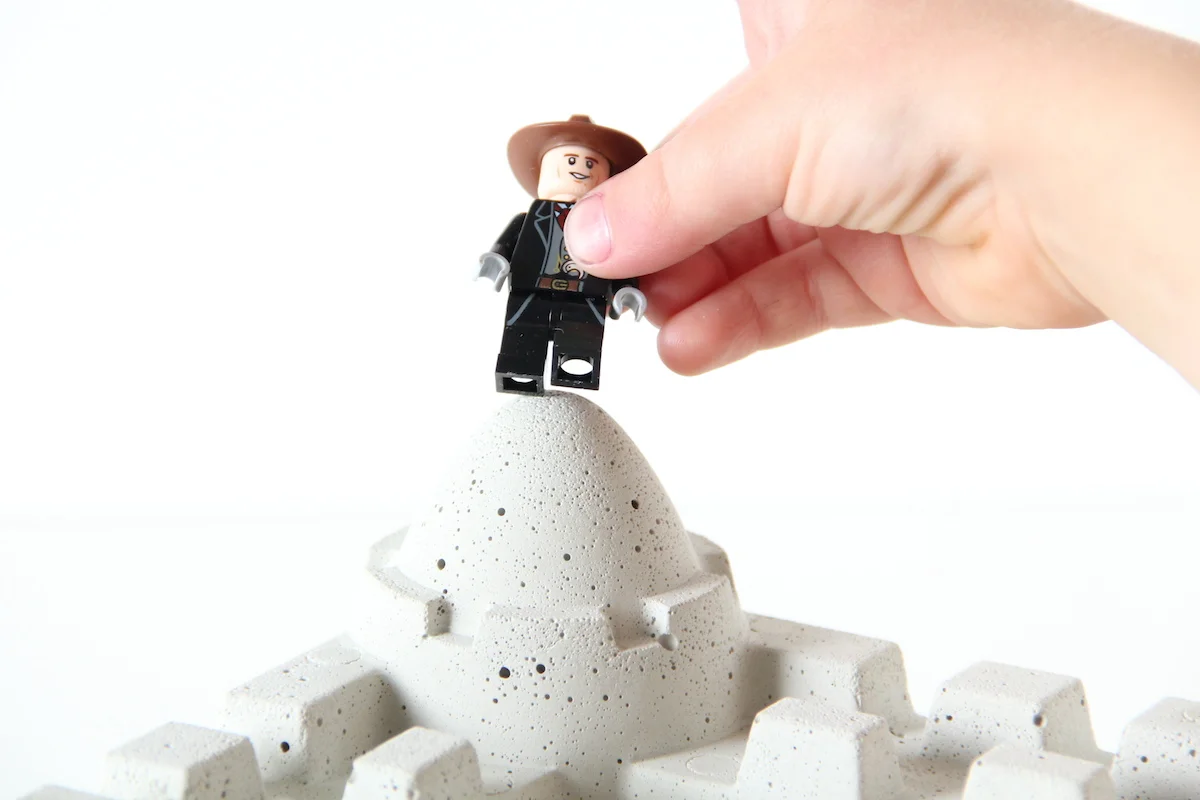
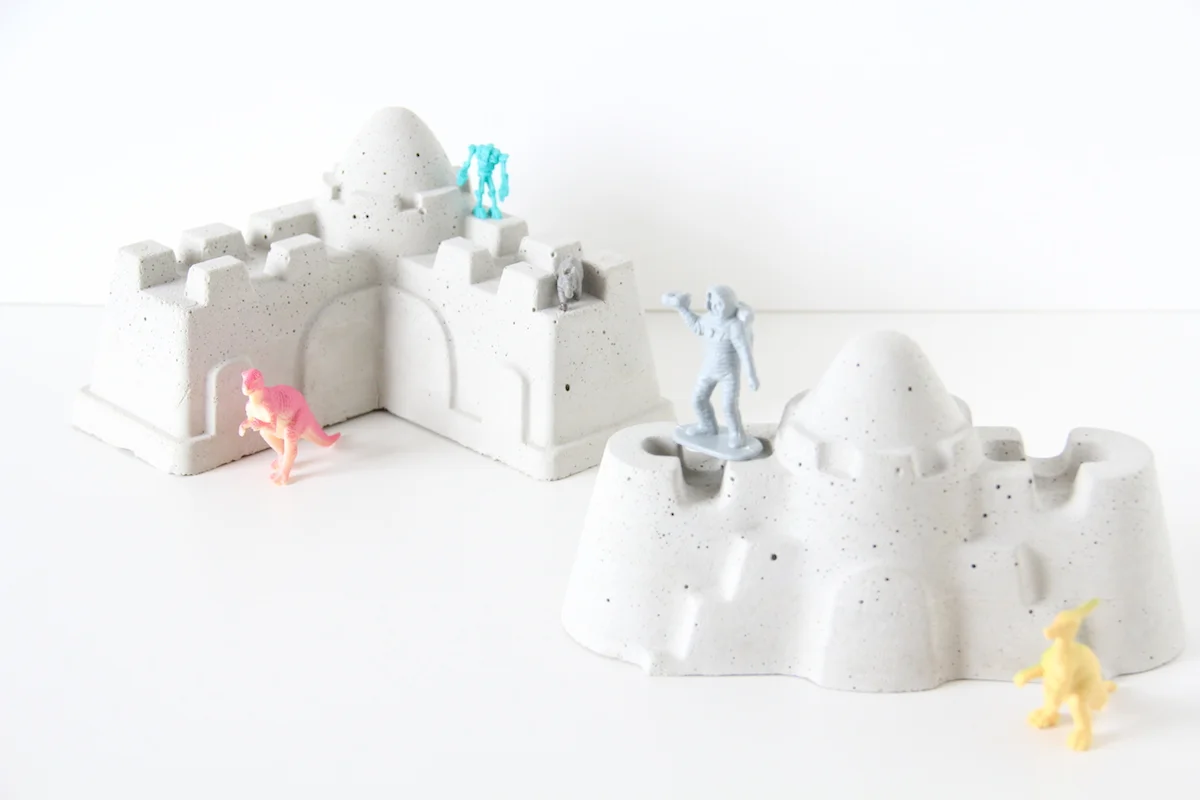
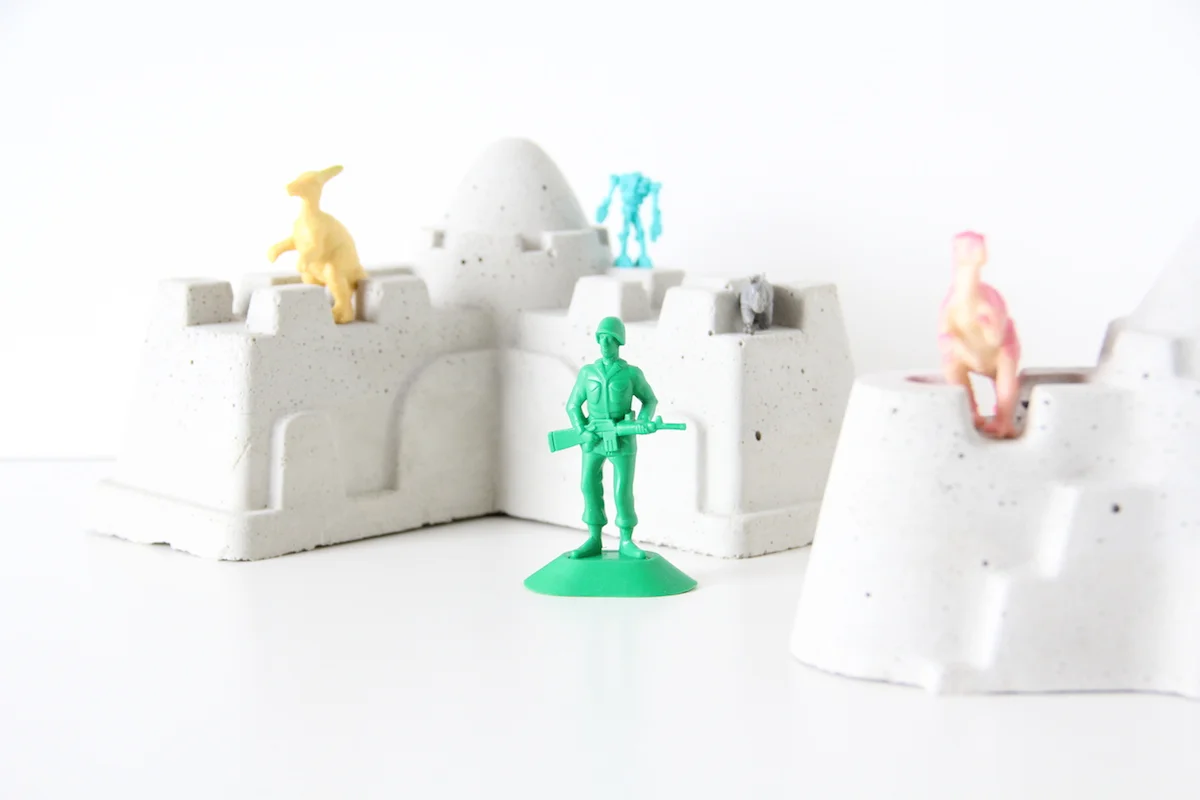
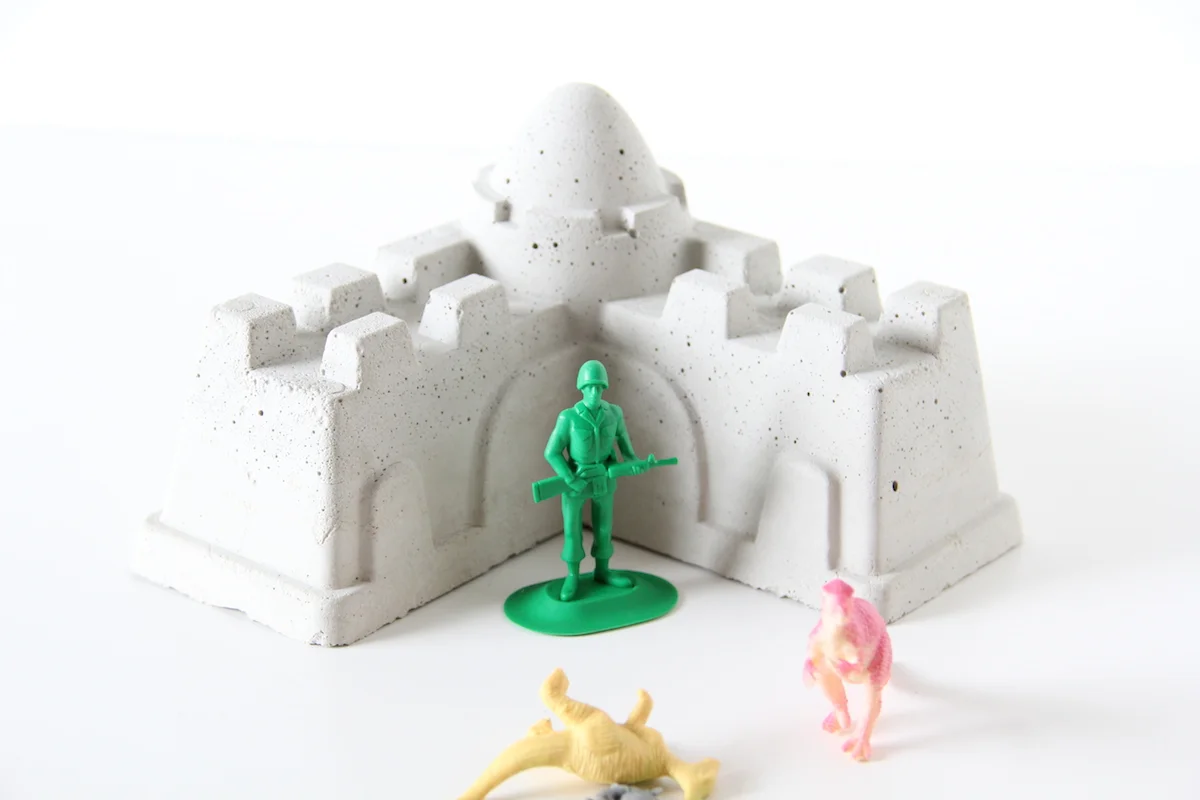
Yes, cement sandcastles! Aren't they rad? They are SO easy to make. Please, please don't be afraid of cement. It's really easy to work with and if you get the right kind, it dries in under 30 minutes. I found these cute sandcastle molds at Target in the toy section for pretty cheap with the hopes that these would turn out, and wouldn't ya know it, they did! The great part is, we can reuse the molds for regular sandcastle making after we've made these. Or, you know. We could just make more cement sandcastles. We have been having a blast with ours and I think they would make for some pretty awesome decorations in Elliott's room. I love cement. Like really love it. I know most people find the imperfections annoying, but that's my favorite part! The little bubbles add character and character is good. I do recommend playing along with your kids when they play with these. They are very heavy and could hurt little fingers and toes. They are cement after all! Other than that, I really think you guys will love them. These would also be fun to let kids paint. We may still do that, just for fun.

Cement sandcastle DIY

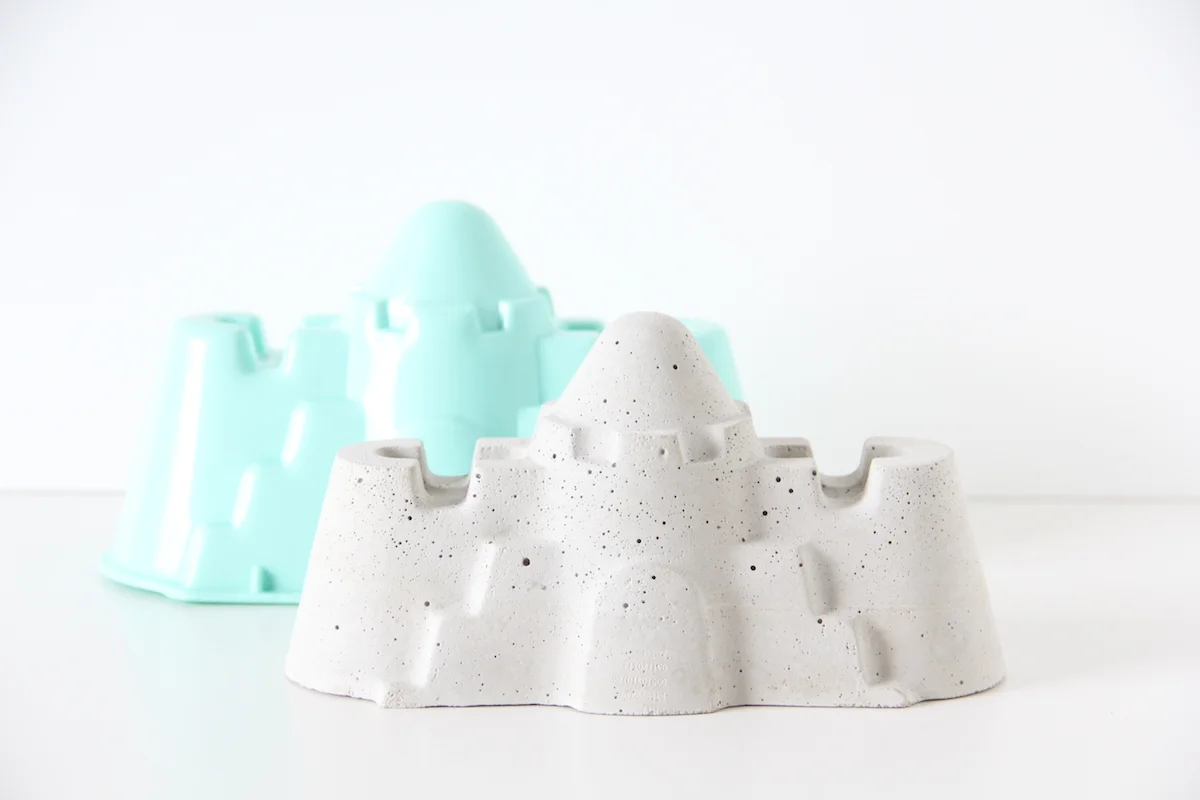
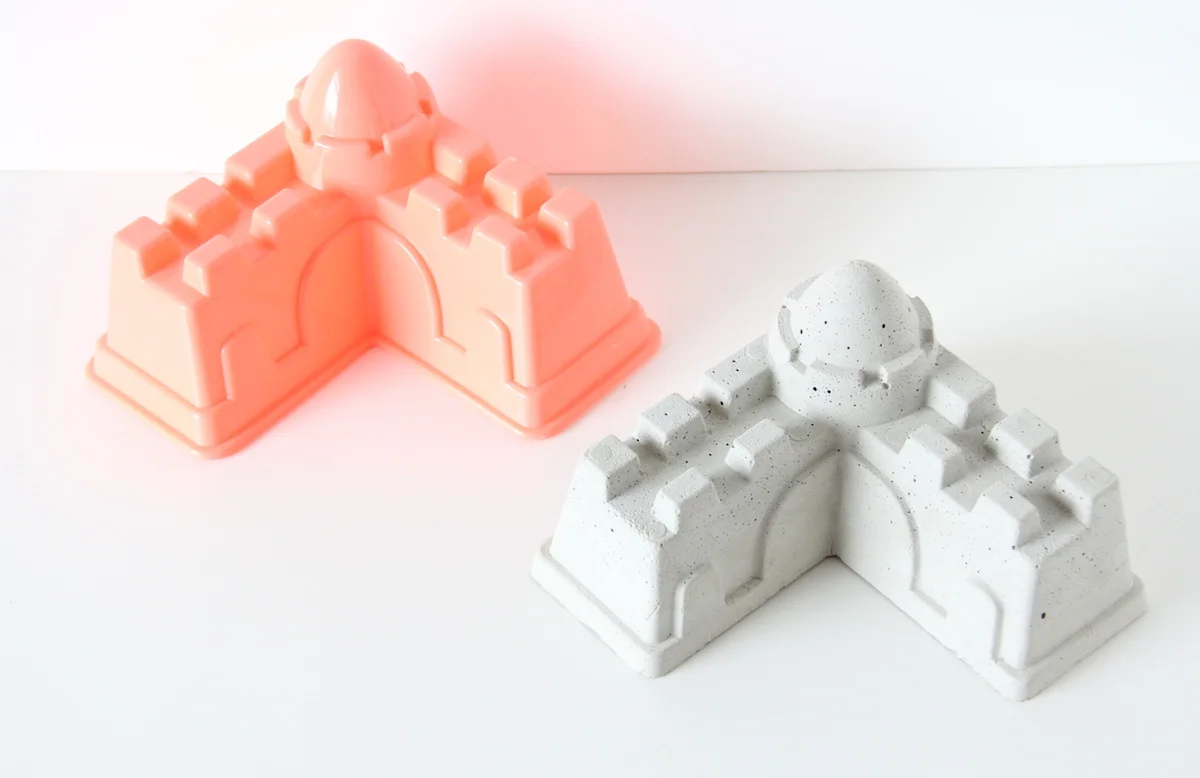
To make your own, all you need is some cement, a disposable container, a disposable spoon, the molds and some cooking spray. Just spray the inside of the molds, mix the cement according to the directions on the box and let it sit till dry. Once it's dry, gently pull the sides away from the cement and turn right side up. It should slide out really easily. Your new cement castle might be a bit hot, that is totally normal. Just let it sit and cool for a while, then play!

Cement sandcastle DIY

GRAPE SCULPTURES

Grape sculptures
Food sculptures

I have never had a very hard time getting Elliott to eat his fruits and veggies, but sometimes you need to switch things up just for fun. We made these sculptures one afternoon for snack and they were a huge hit! We have since used some sunburst tomatoes too. Equally as fun. All you need to make your own is some toothpicks and some roundish, sturdy-ish fruits or veggies. Your kids will love it and honestly, I made my own and it was a blast! To see more, check out the post I did on it over on Momtastic

FATHER'S DAY TREAT TROPHIES

Father's day treat trophies

To go along with our medals we made last week, I decorated some little trophies too! We made one for Preston and one for my dad (Papa to Elliott) who lives close by. Elliott picked out the spray paint colors. He is really good at remembering everyone's favorite colors. Though with my dad's he chose "greenish yellowish" because Papa's first favorite color is green, then yellow. That kid. To make them I just covered the bottoms with tape and primed and spray painted them. I covered the inside of the trophy with tape as well, because I didn't feel like having candy on a spray painted surface would be wise. But, to each their own! Once they were totally covered and dry, I removed the tape. Then I cut some letters out of duct tape with an x-acto knife (typical, right?) I wanted them to kind of match the medals in some way, so the lettering is the connection. We filled them with some pretty (and tasty) treats and Elliott is so excited to gift them on Sunday! Assuming we can keep ourselves from eating the candy. And that's a big assumption.

Father's day treat trophies

FATHER'S DAY MEDALS

DIY Father's day medals
DIY Father's Day Medals

The dads in your life are totally the best, right? Right. Ours too. We made these easy medals for Father's Day to let them know we think they are gold. Aren't they fun? The dads will love them because the little ones helped make them and because deep down, they have always wanted to win the gold. Ideally I would have shown these on Preston, but you know. It's not Father's Day yet! To make your own, you just need a few things you probably already have!

Here's what you will need:

- Cardboard
- Scissors
- Pen
- Duct tape (gold and white)
- X-acto knife
- Cutting mat
- Red, white and blue ribbon
 

DIY Father's Day Medals

To start, draw a circle on your cardboard the size you want the medal to be.

DIY Father's Day Medals

Next, flip the cardboard over and cover with your gold duct tape.

DIY Father's Day Medals

Now that we're all golden and pretty, flip it back over and cut out around the circle with your scissors.

DIY Father's Day Medals

Now for the letters! Take a strip of duct tape and place it on your cutting mat. With your x-acto knife, cut out the letters you need for your medal. Then stick them on!

DIY Father's Day Medals

Next we need to make a hole toward the top for the ribbon to go through. So cut that out with your x-acto knife as well.

DIY Father's Day Medals

String the ribbon through, cut it and knot it at the top and you are done! Fun, right?

DIY Father's Day Medals

FELT BALL SHOOTERS

DIY felt ball shooters

We have been looking for a few indoor activities to keep Elliott occupied while school is out. As much as I would love to spend every minute outdoors this summer, it's just not possible. A working mama has got to work, and clean, and yada yada yada. Enter these guys! These super easy felt ball shooters are a blast to play with! I have to admit, even Preston and I have gotten in on the action. The felt balls really do make the perfect ammo. Soft, round and just heavy enough to go far. You can buy some colorful balls of your own right here. We used the same ammo for our slingshot. These shooters are so easy you kind of have to make them. You have no excuse. Your kids will love you forever. See the full tutorial over here on Handmade Charlotte. Happy shooting!